Garden Reverie Sculpture #11
Posted By Tamara Bonet On June 2, 2013 @ 4:14 pm In Sculpture | 4 Comments
Garden Reverie Sculpture #11
The last step before molding is sculpting the base with flowers and note. (See finished clay pics and promotion [1] and bronze photos [2]).
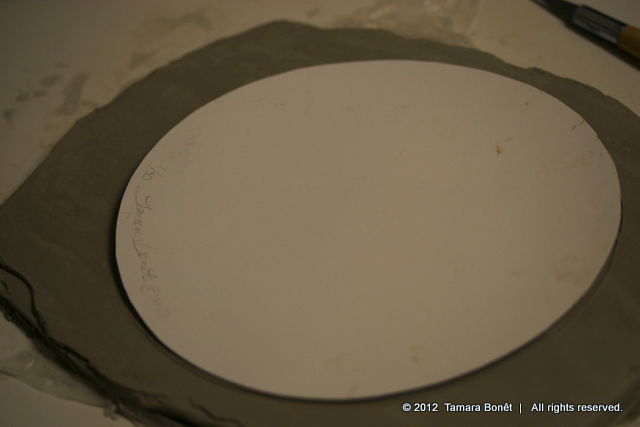
First off, to determine the right size of base, I cut out a circle in paper and carefully placed my lady on it. I wanted it to be as small as possible so that she wouldn’t look bottom heavy. Also, the smaller the base, the taller the sculpture will look.
Next, I needed to put the edition number, my signature and copyright between the chair legs, so I sketched these details on the paper to see what size they should be.
Then I rolled out some clay to a uniform depth of about 3/8,” remembering that it shrinks because it’s water based clay. Using a rolling pin and a couple of porcelain tiles, I rolled the clay in between to an even depth. Then I cut the clay circle out a little wider than the paper circle to allow for shrinkage.
A thin film of plastic wrap works great for signing my name and then poking my signature through the plastic. Then I connect the dots and have the signature right the first time.
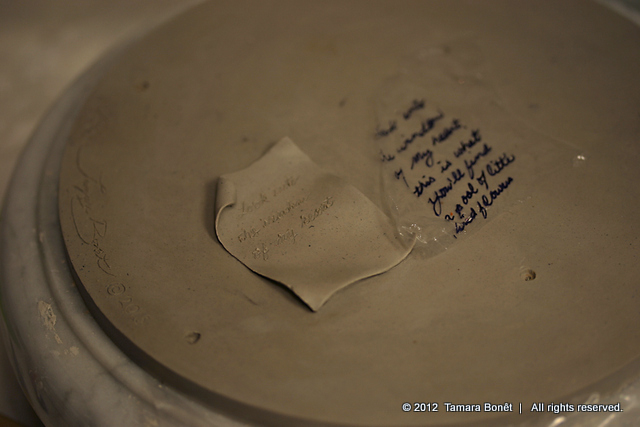
Getting a feel for how big the note should be . . .
I wanted a small bouquet of flowers to add to the story line for her. She may have picked them herself and then wrote the poem while relaxing in the garden, or perhaps she was given the note and flowers. Let the viewer decide. Laying a few rolls of clay helped me see how big the flowers should be. It looked good having the flower stems over the edge of the note, with flowers extending past the chair leg.
The goal was to give some life to the paper, rather than flat on the ground. One edge curling and a few waves in the paper helped. I had to pack clay underneath the edges to help with de-molding during casting. Deep undercuts are not good for a mold, because the rubber will get stuck.
The note could only contain a few words because it’s so small, so I wrote it out on plastic wrap, and then free hand wrote it into clay with a sharp pencil.
 [9]
[9]Decided to freehand write the note rather than poke pinholes through a pre-written note on plastic.
Incidentally, a dear friend of mine wrote the words included on the note. It’s a portion of a song she wrote, and sang with her soprano voice and accompanied by her guitar many years ago. I love that song very much and it brings back great memories of when my mom and I sang the song, harmonizing with her. She gave me permission to include a portion of the song for this sculpture. A bit of her art combined with mine is special sentiment. I thought that the words could have a lot of different meanings, like poetry often does.
A garden rose and wild flowers bouquet is loosely wrapped in a string ribbon.
Well, that is the conclusion of the sculpting portion of this work in progress of Garden Reverie.
Next I will begin applying rubber to the sculpture.
Thanks for following along!
~Tamara
Article printed from Tamara Bonet — Blog: http://tamarabonet.com/blog
URL to article: http://tamarabonet.com/blog/2013/06/02/garden-reverie-sculpture-11/
URLs in this post:
[1] finished clay pics and promotion: http://tamarabonet.com/blog/2013/03/18/garden-reverie-finished-clay-pics/
[2] bronze photos: http://tamarabonet.com/blog/2013/04/24/garden-reverie-bronze-with-blue-green-dress/#more-1946
[3] Image: http://tamarabonet.com/blog/wp-content/uploads/2013/06/IMG_7338.jpg
[4] Image: http://tamarabonet.com/blog/wp-content/uploads/2013/06/IMG_73401.jpg
[5] Image: http://tamarabonet.com/blog/wp-content/uploads/2013/06/IMG_74041.jpg
[6] Image: http://tamarabonet.com/blog/wp-content/uploads/2013/06/IMG_7409.jpg
[7] Image: http://tamarabonet.com/blog/wp-content/uploads/2013/06/IMG_7410.jpg
[8] Image: http://tamarabonet.com/blog/wp-content/uploads/2013/06/IMG_7413.jpg
[9] Image: http://tamarabonet.com/blog/wp-content/uploads/2013/06/IMG_7415.jpg
[10] Image: http://tamarabonet.com/blog/wp-content/uploads/2013/06/gardenreverieclaynote.jpg
[11] Image: http://tamarabonet.com/blog/wp-content/uploads/2013/06/IMG_7420.jpg
Click here to print.


