

Sculpture Mold Tutorial of “Wealth” Sculpture

Clay original model.
Sculpture Mold Tutorial of “Wealth” Sculpture
Hi Friends,
This sculpture mold tutorial is going to be very lengthy and in depth. I hope that it will benefit you in your efforts at mold making. These notes will help me to remember what I did so that my next mold will be as successful. ![]() Here is my journey with making my first multi part silicone mold.
Here is my journey with making my first multi part silicone mold.
Supplies Needed:
- Krylon Crystal Clear acrylic spray
- T-pins, mixing buckets, stir sticks, disposable brushes, latex gloves
- Silicone, FGR plaster, fiberglass, Cabosil, Ultrafast catalyst (optional)
- Black marker pen
- Weighing scale, air compressor with air nozzle (or can of compressed air)
- Exacto knife/razor, teaspoon
- Oil based clay, petroleum jelly, dish soap
- Nuts and bolts
Silicone Mold
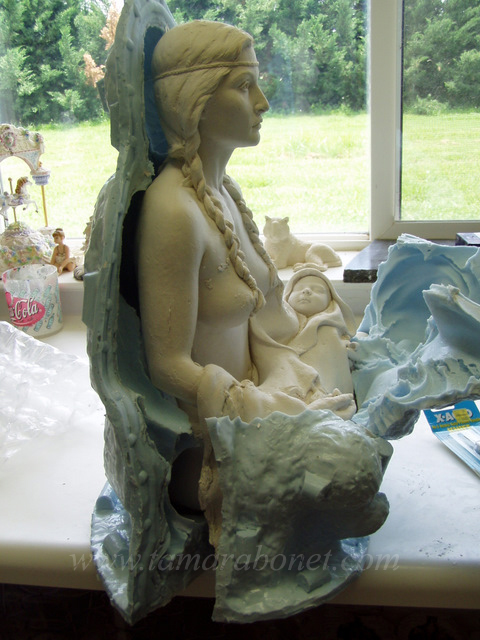
Okay, here we go, I first added an oil clay base underneath her to raise her up. This will serve as a funnel or spout area to pour the casting material (wax or plaster etc.) into. Toothpicks were used to hold the clay base onto the original but they really weren’t needed. Since some of the blanket is falling down below her body (on her other side) then the raised base will help with molding that area as well.
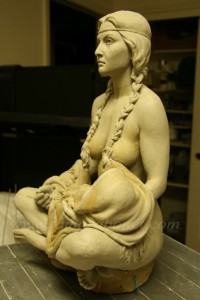
Clay original of Wealth sculpture.
Here are a few more pics of the original which is made from ceramic clay:

Clay original of Wealth sculpture.

Clay original side view.
Silicone will react with oil based clays that contain sulfur and so a sealer is needed. However, my oil based clay doesn’t contain sulfur but I wanted to seal the surface of the ceramic sculpture for a couple of reasons:
- First of all I thought that maybe water vapor would come through and cause air bubbles in the silicone. This idea proved not true because my mold lady didn’t use sealer spray on my other sculptures and the mold turned out fine.
- The second reason is that the spray helps to hold all the detail areas in tact so that when I demold her, she will survive better. I usually like to save my originals and fire them in my kiln. The spray also holds in the moisture and this helps it to not crack or dry out as quickly.
Here you can see that I used Krylon Crystal Clear Acrylic spray to seal her.

Spray the original clay sculpture with a sealer.
The tendril of hair that is coming down off of her right breast was cut off in order to mold it separately. The rest of her was cast in one piece with no appendages cut off. Very often on my other sculptures the hands or legs are cut off in order to mold separately. The way her hands are positioned I was able to keep them on the sculpture. I did put a small piece of clay in between her right thumb and fore finger. This allowed the hand to come out of the mold easier.

The underneath portion of the sculpture.
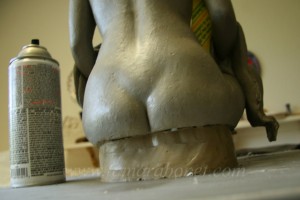
The underneath back portion of the sculpture.
It’s important to not have a gap in between the oil based clay base and the sculpture so that the silicone doesn’t get stuck. If it did then this would make the demolding process more difficult.
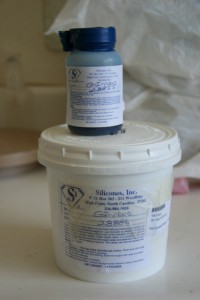
GI-1000 silicone rubber.
I used GI-1000 and purchased it from the Compleat Sculptor. A blue catalyst comes with it and is mixed into the rubber at a rate of 1 part catalyst to 10 parts rubber.
- So for a first batch you could use 100 grams of rubber and 10 grams of catalyst.
It’s best not to make too big of a batch of rubber because the rubber thickens after the catalyst is put in. The first layer needs to be as runny as possible to get into all the detail areas.
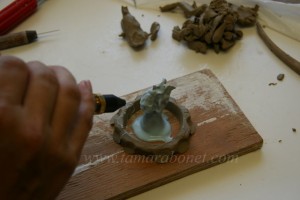
Blowing air onto silicone on the hair tendril.
First apply the rubber with a cheap disposable brush. Then use an air nozzle with your air compressor set at maybe 25 psi or so. Blow the rubber all around and into all the detail areas. Allow the rubber to go very thin so it’s nearly see through. This will ensure many less air bubbles in the rubber. As the rubber cures you will see air bubble rise to the surface. Try and pop ones that are big and let the air escape. When the next layer of rubber goes in, hopefully it will work it’s way into the air bubbles for one homogenous surface.
For the hair tendril, I made a spout at the bottom of it that will allow for pouring the casting material into. I stuck the tendril upside down onto a wire that was inserted into the wood. The clay border at the base isn’t really necessary but it does hold in the silicone. If it weren’t there, you could just cut the silicone in a circle after it’s cured.
If you want to speed up the process of adding layers of silicone then Ultrafast catalyst can be used. I chose to use half the blue catalyst that comes with the rubber and half the Ultrafast catalyst. The working time of the rubber ends up being around 18 to 20 minutes and then next rubber layer can be put on in about a half hour (for the first layer wait until it’s completely cured which can take longer).
The first layer is very important because it is what captures all of the detail. I ended up having to remove the rubber twice because I put it on too thickly.
Here are a few examples of what too thick is for a first layer:

First layer of silicone is too thick.

Silicone is too thick for a first layer.
I then removed the silicone and had little damage to the original.
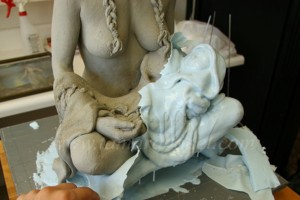
First layer of silicone is being removed.
I tried again with what I thought was thinner silicone but it was still too thick. I removed this first layer also.
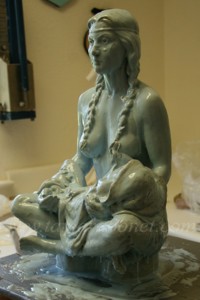
First layer of silicone is too thick.
These bubbles didn’t show up until the rubber began to cure. They are microscopic bubbles at first and really can’t be seen when you are applying the rubber. If I had a decompression chamber that some mold makers use to pressurize and remove the bubbles, then I wouldn’t have to worry about putting on such a thin layer.
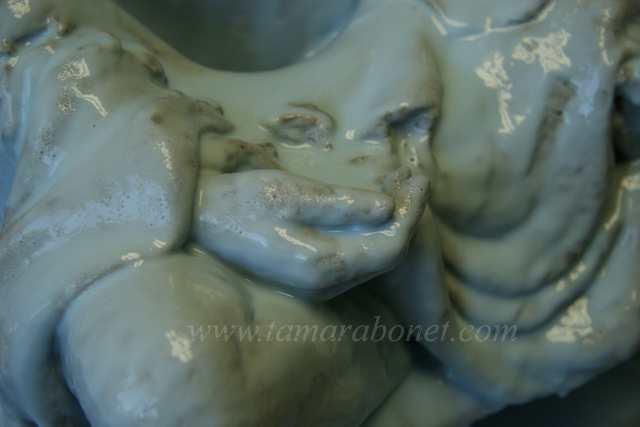
Bubbles are forming in the silicone.
Maybe these bubbles wouldn’t show up on the surface of the interior wall of the silicone but I didn’t want to take a chance. If they did show up then my cast would come out with bumps on the surface.
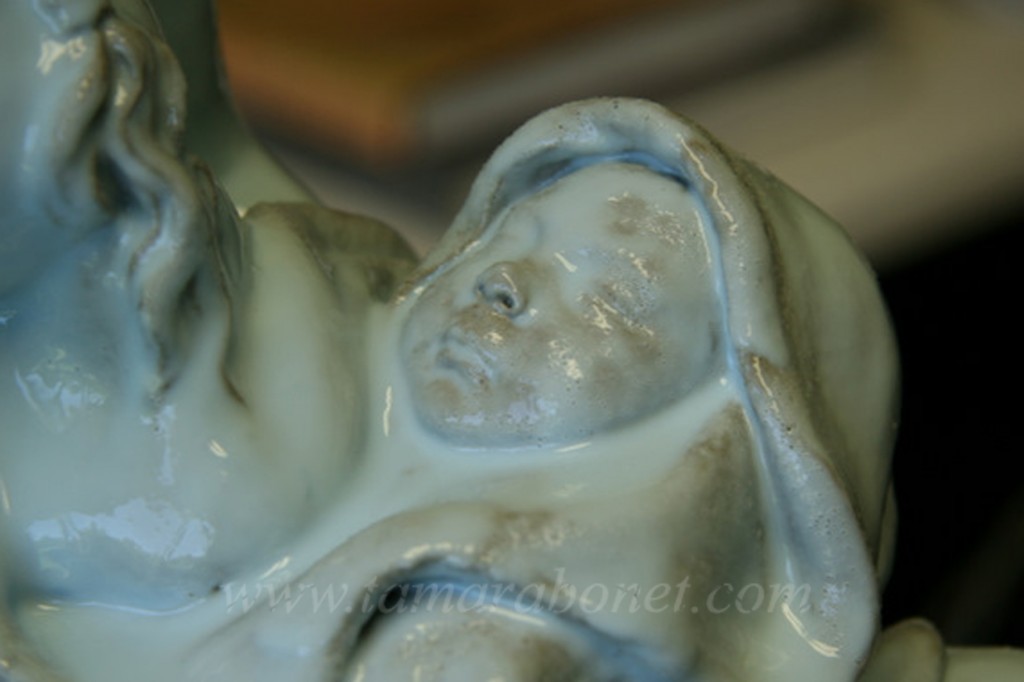
Bubbles are in the silicone on the face.
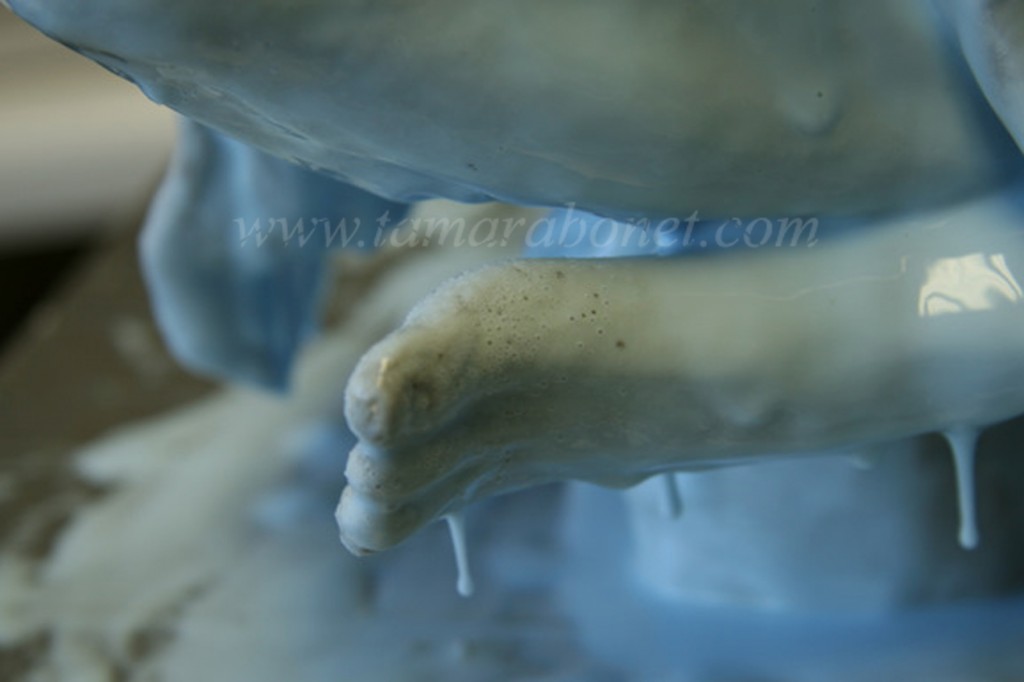
Bubbles are showing in the silicone on the feet.
Finally I put on one more first layer and this time it was the right thickness. I put it on as thin as I possibly could. It needs to be see through. After applying this first layer it’s important to let it set until it’s cured which could be for 4 to 6 hours. Some even leave it for overnight before they put on the next layer. If you use Ultrafast catalyst then it will cure much quicker. The reason for waiting is that if you start to apply the second layer and it’s not cured then it could grab the first layer and lift it up off of the detail areas.

Correct thickness for first layer of silicone.

Closeup to show correct thickness of silicone's first layer.
Here the second layer is being applied. It’s good to start at the top of the sculpture so that the rubber is flowing downwards. This is more important on the first layer then on the others. After layers have cured, it’s good to cut off drips that are hanging down. I inserted a piece of plastic (from a butter lid) in between the arm and body. This will help to divide the mold.
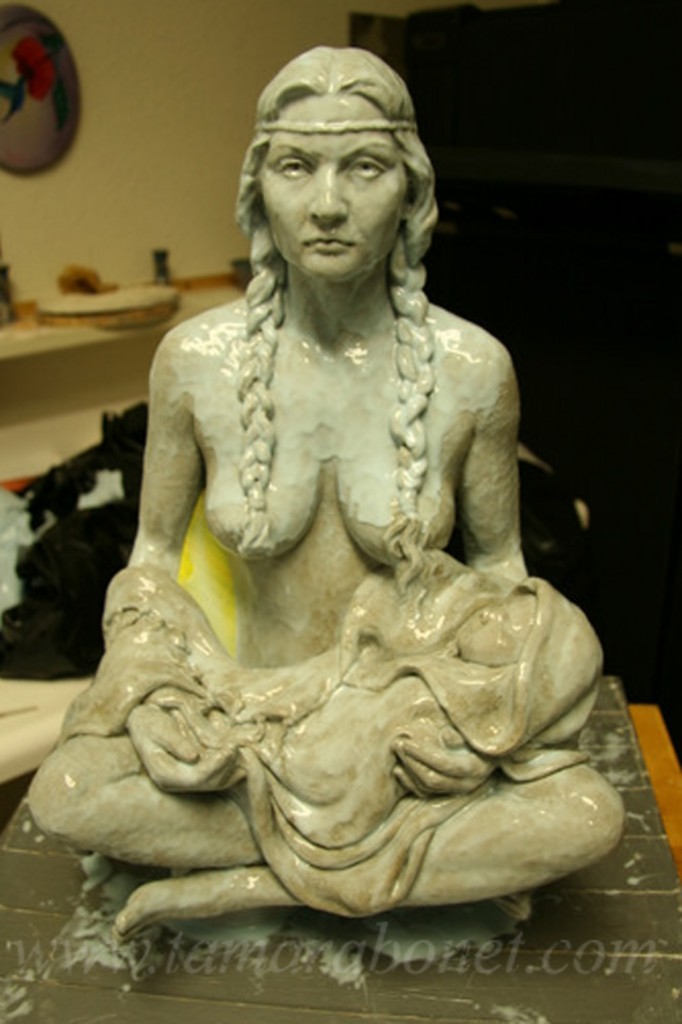
Putting on second layer of silicone.
After about the 3rd coat the silicone can be thickened with cabosil. This allows you to put it on thicker. Also, deep areas and undercuts can be filled by using the thickened silicone in a paper plate rolled up like a pastry tube and squeezed out. I didn’t do this but wish I had because some of the areas were hard to reach.
The Cabosil is fluffy and will float away in the air as it’s being stirred so I wore a dust mask.
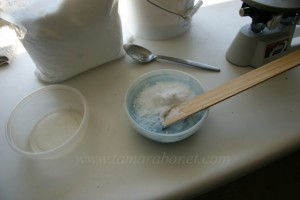
Mixing in Cabosil to thicken silicone.
Try to have the rubber be built up to around 3/8 inch uniform thickness. It may take 5 to 8 layers to get this thickness depending on how thick your layers are. For your last coat, use silicone that hasn’t been thickened with Cabosil. The reason for this is that Cabosil causes the silicone to go on very lumpy and bumpy. The last layer can smooth everything out so that the mother mold will pull off easily.

After a few more layers of silicone.
Using a marker pen draw a line to show exactly where you want the parting line to be. It’s good to have the line be away from detail areas such as the face. The parting line on the finished cast will need to be touched up later on so it’s best to not have it near important detail. Think about how the mold will pull apart and where it would be good to have the seam.
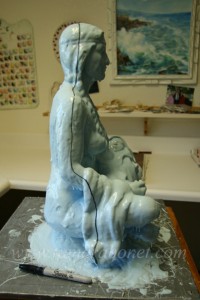
Draw a line to show where seam line will be.
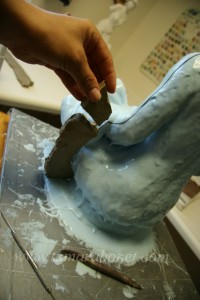
Add oil based clay to make a wall along parting line.
Getting the oil based clay to stay on the rubber is a challenge. It’s good to use small wedges of clay and put them on your seam line. I used T-pins and extra clay to give added support.
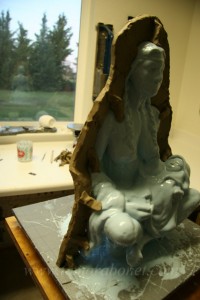
Back side of parting line held up with supports.
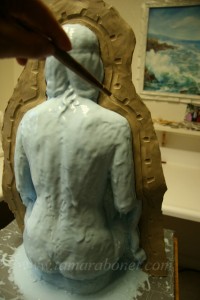
Cut out a groove with a loop tool.
A loop tool works well for cutting out a groove in the parting wall. This groove will help the silicone stay in place once the mold is finished.

Keys for the silicone are made in pvc pipe.
The rounded keys were made by cutting a trough into pvc pipe, close up the ends with clay, brush the interior with mold rinse (or water with dish soap), and pour silicone rubber into trough. Cutting the keys with a razor works the better than with scizzors.
After a few layers of rubber were put on the perimeter wall, I then put a border of clay around that to help hold the rubber within that boundary. It really wasn’t needed because if extra rubber went over the edge then I could just trim it off with a razor blade.
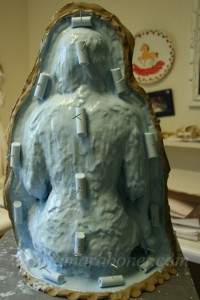
T-pins hold on the keys.
After curing, remove the clay border and then brush the silicone wall that you created with water/dish soap mixture. This will allow you to separate the silicone border when demolding the original. Be very careful not to get the dish soap mixture onto other areas of silicone because any other layers of silicone you put on will not stick. Apply layers of silicone to the silicone wall until it’s 3/8″ thickness and this will finish out the silicone part of the mold.
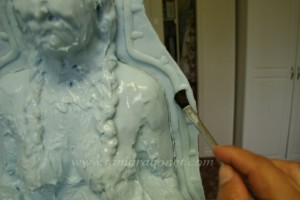
Carefully brush on thinned dish soap/water mixture on divider wall.
Mother Mold
Now the following steps are for making the mother mold which holds the flexible rubber in place.
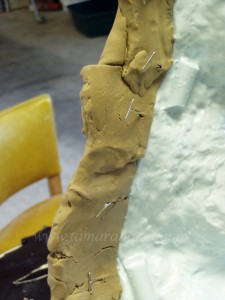
T-pins help to hold on the clay wall.
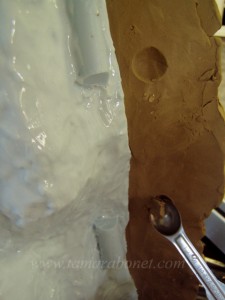
Scoop out keys for the mothermold.
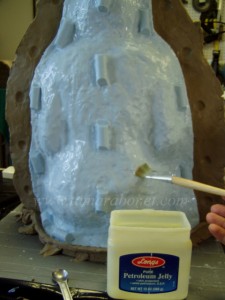
Apply petroleum jelly to silicone.
Make a clay border in the same way as you did for the silicone border. This time hydrocal and fiberglass will be put on the border. Scoop out keys with a teaspoon. This will help line up the mother mold in the correct position when it’s put back together in the future.
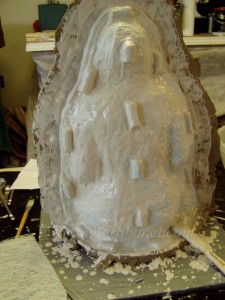
Brushing on hydrocal to silicone.
I brushed on hydrocal on to the silicone but I’m not sure if this step is important. For the other sections of the mother mold I didn’t do this and it seemed to be just fine without doing it.
Recipe for Hydrocal FGR 95 plaster
30 parts water/alcohol to 100 parts plaster
Edit: See some mold tips from my foundry and why I no longer use denatured alcohol but rather warm water and salt to accelerate setting up of the plaster.
For example:
- 2000 grams plaster
480 grams water
120 grams denatured alcohol
Or if you want to do a smaller batch of plaster then here’s a formula:
- 1000 grams plaster
240 grams water
60 grams denatured alcohol
Hyrocal FGR 95 plaster is used because of it’s properties of being strong even when thinly applied, this is especially so once fiberglass is put in it.
Measure water and alcohol and put in a 5 gallon bucket. Then measure plaster and sift through fingers into the water/alcohol mixture. Let the plaster set in the mixture for at least 5 minutes to soak the plaster correctly. As long as the plaster has not been mixed then it won’t set up even if it sets in the water for an hour.
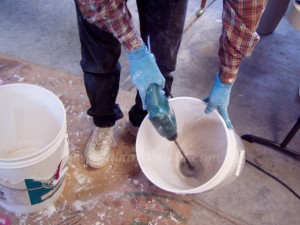
Mix the hydrocal with a paint mixer tool.
Mix the hyrocal with a paint mixer tool for one minute.
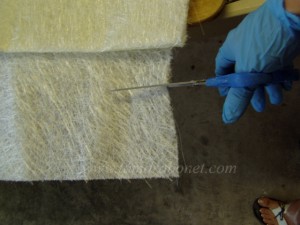
Cut sharp edged sections with a scizzors.
Sharp edges can be made by cutting with scizzors and used for borders and edges. Frayed edges are best applying when you want the edge to blend into another area.
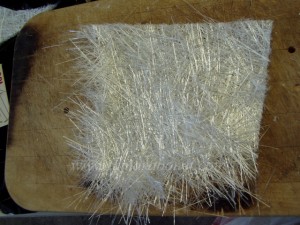
Ripped edges of fiberglass.
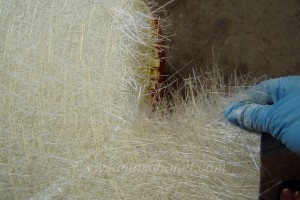
Tear the fiberglass for a frayed edge.
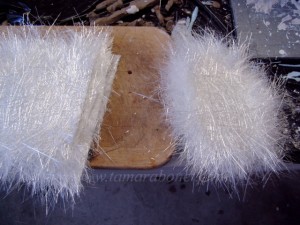
Stack ripped edged fiberglass separately.
Tear the fiberglass in order to make a frayed edge. Stack in two piles, one with the frayed edges and one with sharp edges for borders. This will allow them to be easily picked up even with plaster on your hands.
Use double gloves in order to help the shards from the fiberglass to not penetrate into your skin. Also, long sleeves, pants and shoes are important unless you want to itch a lot. 
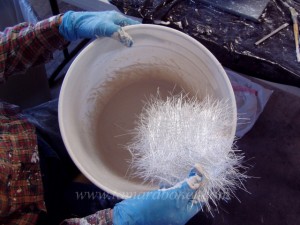
Fiberglass piece ready to go in the hydrocal.
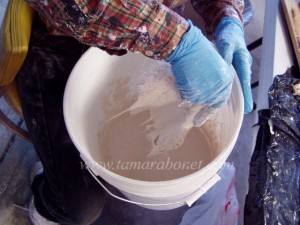
Dip fiberglass into the hydrocal.
Soak fiber glass in the hydrocal and then lay it on the mold.
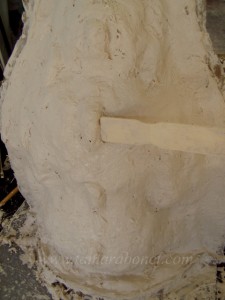
Press with wooden stick around keys.
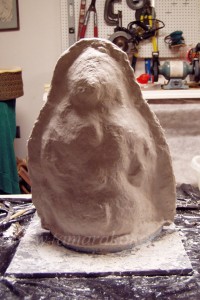
Finished back side of mold.
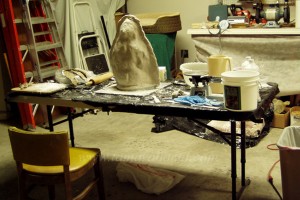
Back side of mother mold is completed.
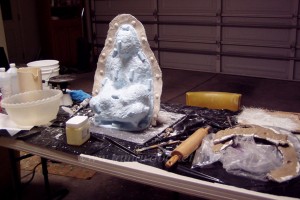
Front side of sculpture ready for mother mold.
After I made the back side all in one section, I decided the front needed four sections. The mother mold is rigid once the plaster cures so it needs to pull off straight away. If the rounded teaspoon keys are put in the mold section wall, they need to be carefully thought out. If put in the wrong place, the keys will lock in the mother mold and it will be difficult to remove.
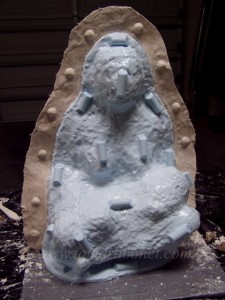
Front side is ready for mother mold.
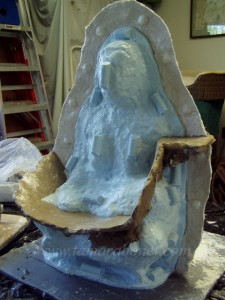
Oil based clay makes a divider wall.
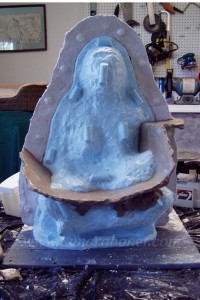
Front view of clay wall.
Apply petroleum jelly to the section and then lay on the fiber glass. Soaked fiberglass is being applied to mold.
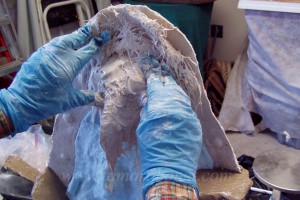
Fiberglass could have used more soaking in the hydrocal before applying.
I could have soaked the fiber glass more so that more hydrocal would be on it.
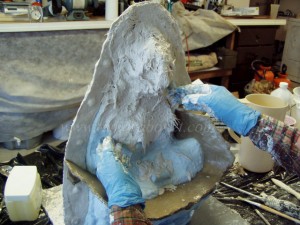
Press the fiberglass in good to remove air bubbles.
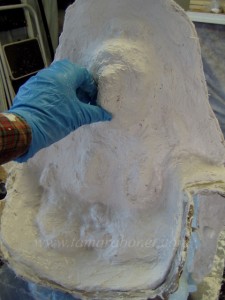
Press in around the keys to remove air bubbles.
After doing one layer of fiberglass, I let this set up and harden (about 1/2 hour or so). Then I applied another layer. This may be overkill but it gave me a strong mother mold.
A mold lady said that she uses the type of fiberglass that is continuously woven (not cut up pressed fiberglass such as I have). She cuts out one square and then pulls it apart into 3 layers. She uses 2 of the layers to go over the section of the mold. Then the 3rd layer she puts only around the edges for added strength; this allows her to have a lighter weight mold.
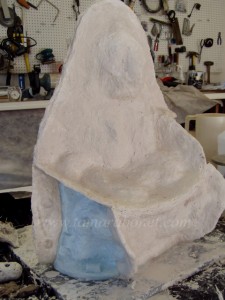
Side section of mother mold ready to be made.
These molds can be pretty heavy and especially once the casting material is put into them. Manuevering them around in order to roll the casting material inside can be difficult if it’s very heavy.
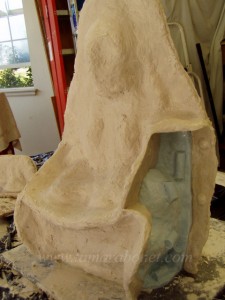
Last section of mother mold ready to be made.
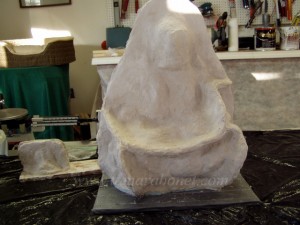
Finished mother mold for sculpture.
The hair tendril mold also will need a mother mold. It’s good to have a flat area at the top of the mold. The reason for this is that when the mold is turned over and casting material is poured in, then it is often tapped on this area. In order to get the casting surface to go in all of the areas, the mold is tapped. If it is flat it will tap better and the mold can stand up better on a flat surface.
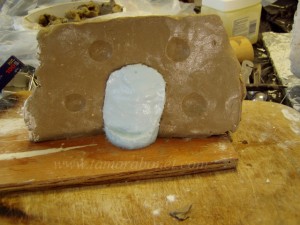
Mold for hair tendril ready for mother mold to be made.
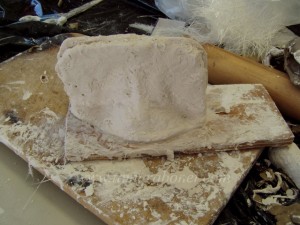
Finished mold for hair tendril.
Holes are drilled into the mold. So as to not drill through registration keys, I marked with a black pen where the holes would be drilled as each section was made.
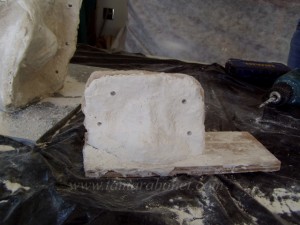
Holes are drilled into the mold.
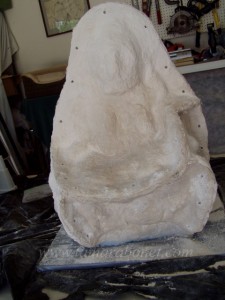
Holes are drilled to insert bolts into.
This mold required a variety of bolt lengths since some areas are thicker then others.
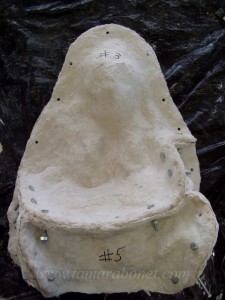
Hold mother mold together with nuts and bolts.
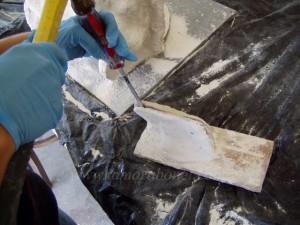
Screwdriver is inserted to open the mold.
A screwdriver worked well for removing the sections.
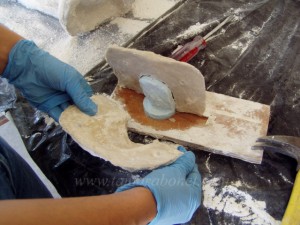
The mold is opened.
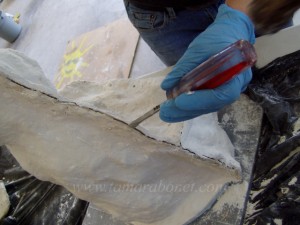
The crack is widening along the seam line.
It was exciting to remove the sections and see that the mold worked properly. I numbered the sections according to how each one should be removed. However, when it came time to actually remove the sections they came apart a little differently. Even still, forethought with how to remove the sections is important.
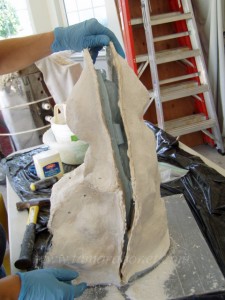
The back side removes easily from the silicone.
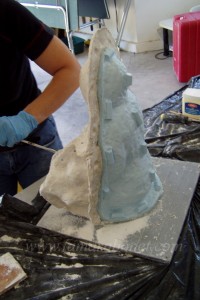
Pry open the front sections.
The silicone parting line is tight but with pressure I can sort of rip it apart because of the water/dish soap mixture applied to the surface.
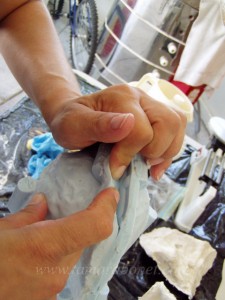
Open the silicone partition line.
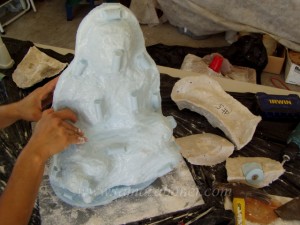
Separating the silicone partition line.
By using an exacto knife I can cut through the initial layers and following the black line that I drew on.
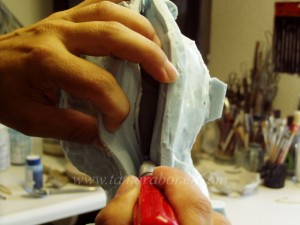
An exacto knife cuts through the first few layers of silicone.
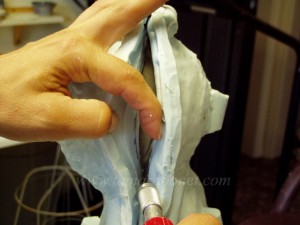
Cutting along the black line.
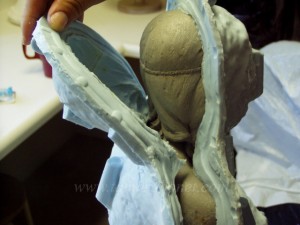
Removing the silicone off the original sculpture.
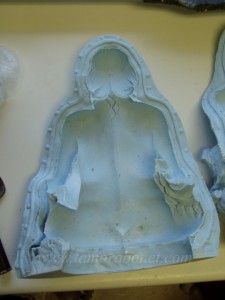
Back side of sculpture seen in silicone.
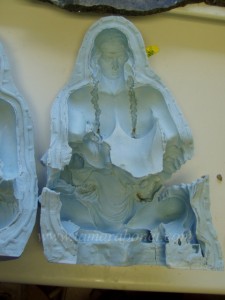
Front side of sculpture seen in silicone.
Using a razor, I cut into the silicone towards the foot and hand in order to help release and open the mold. It’s best to use a zig zag cut so that when the rubber is put back together in the mold, it will join together better.
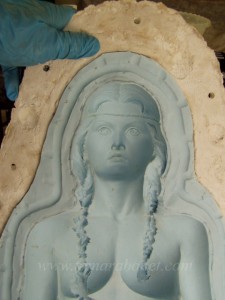
Silicone face.

Closeup of face in reverse in silicone.
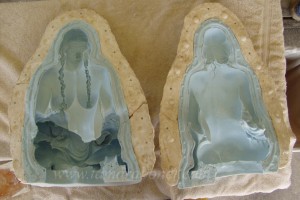
Mold cleaned and ready for casting.
To know whether the mold is really successful means that a cast needs to come out holding the detail of the original. Having the first plaster emerge from the mold looking good was a happy moment.
Plaster cast coming out of the mold.
After I took out the original clay sculpture I poured a plaster cast. Here is that cast coming out of the mold. Notice how the mold opens up where I cut the mold from the edge towards the hand. On the other side it’s cut towards the foot.
On another tutorial I hope to share the process of pouring a plaster cast. More finished plaster pictures can be seen in the bronze section of my website.

Finished plaster with faux bronze patina.
Thanks for watching the process.
~Tamara


thank you so much, tamara !! that was such great info you shared, it makes clear how much difficult work all is, but also that planning and careful applying the different layers of the silicon yield the desired result… i am still amazed that the silicon demolds so well from the sculpture, as its only two parts, and there are so many deep creases in the blanket and other areas. really great to see that. thank you for sharing, i know, some time, i want try that too ! i am looking forward to the casting you said you might do
Wow, Tamara! Amazing sculpture and indepth tutorial. Even a layman like I could make a sculpture and silicone mold now…NOT! Keep up the wonderful, inspiring work. ZD
I just wanted to thank you for the time you spent showing the mold making process. I’m just beginning in the sculpture world (I did dabble at it once before, but nothing came of it then). I’ve been working on a sculpture and I’m nearing a point where I need to think about making a mold. I’m pretty nervous about it because of all that could go wrong. It’s a small sculpture with very delicate tiny detail and I’m nit even sure that I’ll be aboe to apply the silicone without smearing the very soft oil clay. But I’ll just take it slow. I’m always looking online to get ideas about the mold making process and to look at hard work of other sculptors. Your tutorial is the best I’ve seen so far. Thank you again.
Thank you all for your comments.:-) I’m happy that the tutorial is benefiting and helping people. I sure know that I’ve appreciated all the help I’ve been giving along the way when learning to work with clay. Also, I’ve seen many mold tutorials including watching my own detailed and intricate sculptures be molded by professional mold makers. So my version is a hodgepodge of all that I’ve learned.
Very thorough and helpful post.
I have two questions:
1. Do you keep the original clay model in case you want to remold or do you recycle it?
2. Do you store the mold with something in it, like the original clay or a plaster of paris casting?
Hi Roy,
Yes, I do keep my original although there always are repairs to be done that range from minimal to moderate. With her it was very minimal. Her toes broke off and her head came off. Some of the fabric that was hanging down broke into fragments and her braids popped off. It took about one and half sessions of work to repair it all. I’d call that minimal since I’ve had much worse repair jobs.
What I do with the original is fire it in my kiln. It just so happens that this Indian woman blew up in the kiln. However, amazingly, with much effort, I put her back together again. In a few days I may post pics I took of that process. She’s just now cooling off in the kiln now after 4 firings total. I’m adding various glazes to her blanket which looks nice and colorful.
Since the mold is snapped into place with the keys, it doesn’t lose it’s form or become warped as it’s stored. Some people like to make a rubber or resin master that can be stored in the mold but I don’t. I wouldn’t reccommend using a plaster cast for such a purpose because it can dry out the silicone rubber leaving it prone to cracking.
Hope you have success with your ventures in mold making.
~Tamara
I think your art is wonderful. It seems as though you can just reach out, and if you touched your peice, your fingers would push into the flesh. Thank you for the tutorial. I have been trying to sculpt for almost two years now and have only fired my stuff. I would like to try to do a mold and your tutorial will help. Looking forward to pouring plaster cast. Also, is there any book you can recommend on mold making?
Thanks, Michael
Hi Michael,
Glad the tutorial is of help. I don’t really know of any books on mold making with silicone but I’m sure there are lots out there. Here’s a thread on a forum that I’m a member of: http://www.heidimaiers.com/phpBB/viewtopic.php?t=400
The thread gives more tips on making molds.
~Tamara
Hello Tamara,
i think this is really useful information. i m a ceramicist and have knowledge about making plaster molds for production ceramics,. i have however always wanted to have a go at using oil based clay, latex etc.. to make figures and armatures. thank you for your website. it has really inspired me and i will have it to hand when i have a go for myself.
i was wondering if you know whether it is a 100% requirement to cover the clay model in the rubber coating before using the plaster mold onto the clay body. would a successful mold be made if i used plaster straight onto the clay body? or would i have problems releasing the plaster from the model?
i hope that made sense! (:
thank you for your time and your fantastic website
kind regards
emma (:
Hi Emma,
Plaster molds will only work for simple sculptures that don’t have undercuts. I have tons of undercuts in my sculpture so the only way to reproduce them is using rubber (silicone or latex). I would love to be able to make a plaster molds for my work because then I could have ceramic casts made by pouring slip into the molds.
Well, I hope that you have a good experience trying out the process. It is very exciting when you get to pour your first cast into the mold that you’ve made.
~Tamara
[...] see prior moldtutorial for in depth [...]
Hi Tamara,
Just read your tutorial; thanks much!
I was just wondering the purpose for adding denatured alcohol to the FGR-95 water? I’ve used this kind of plaster before, and used water alone to wet it out. What advantage does the alcohol give you?
Thanks,
Kurt
Hi Kurt,
As far as I can remember, the professional mold lady said it was to give the plaster mix a longer working time. Sometimes in the heat, it would otherwise want to set quickly. There might be additional benefits as well. Really, I haven’t had much experience without using alcohol so I don’t know the advantage/disadvantages. Wish I had more answers for you on that one. I just trust the mold lady as she is excellent at what she does.
[...] review of the large ”Beautiful Dreamer” sculpture’s mold process. See wealthmoldtutorial for complete mold process. I’ve learned a few things since the “Wealth” mold [...]
Thank you so much Tamara for this excellent tutorial
One question. You mention chopping off feet etc and then re-attaching once molded.
Can you do this if casting in plaster / hydrocal etc. and how do you attach?
Or is this only suitable for bronze castings?
Monica
Most of the time when I chop off a hand or leg, it’s really the best way to mold the piece so that the cast will come out well, whether that is plaster or wax for bronze.
For plaster, in order to attach pieces: drill holes in both pieces that will be joined together, insert threaded rod with glue. Wet thoroughly seam line and gaps and fill with new plaster.
Tamara, may I ask why you put denatured alcohol in the plaster? Peter
Hi Peter,
Just found out from the foundry mold lady why my professional mold maker uses denatured alcohol- it’s used to extend the working time of the plaster…..
Found out this is not necessary, or even desired, unless the mold mother mold section is very large and time is needed to lay in the fiberglass.
Mold lady says that she uses dashes of salt (doesn’t measure just throws it in) and warm water to accelerate the drying time rather than extend. This is very helpful info because the mother mold section were taking about an hour to set up using the alcohol and that’s forever!
~Tamara
[...] main mold tutorial is here. Keep in mind, info from the mold lady in this blog post is the latest info and what I’ll [...]
I like this tutorial very much.
I see one thing that I have never seen before and that’s you’re use of the silicone parting. What is the reason for this?
I ask this because I am working on my first little mold,since I am not happy with what my moldmaker made, and i am using you´re instructions as a guide line.
Tamara it’s so impressive and beautiful to see what you create and it’s incredibly generous as well for you to offer tutorials. I’ve been getting into this stuff unexpectedly and am in process with my second ‘slip mold’ sculpture, yet the first one wherein i’ll be making all of the molds myself. I spent so much time creating with a front, back 2 part mold in mind; yet looking at the complexity of your work I wonder if it can only be translated into plaster and bronze, or is slip possible too. My silicone was recommended not to be thinned, and it was exhausting to come up with an outer layer that wouldn’t hold on to the plaster shell. The detail survived; however my original was almost completely shattered because the plaster would not release from the latex/silicone.. I desperately tried to learn what I was doing but only after that step have i found you. I sprayed the silicone with airid but in the future I would coat thinly with vaseline. I’m not familiar with hydrocal plaster or your silicone mix. How is your silicone thinned? I’ll keep following the threads of your various tutorials and perhaps in the future a three part or more mold will not seem so completely unattainable. I guess I still need to stay focused with my more modest technical challenges that are at hand. I’m hoping that my 2 plaster replica is intact and bubble free after pulling of the rubber glove mold. It will be a triumph for me to create a successful 2 part slip mold next and ultimately be able to make clay models. You exhibit not only a technical virtuosity and great communication skills, but your sculptures are refined and moving. Thanks for your sharing and blessings for your continued inspiration and productivity
Hi Rene,
The silicone partition wall aids in keeping the silicone in place and not shifting in the mold. It also makes for a very tight seamline which results in less finish work in the wax or silicone cast.
Hi Michael,
Thank you for your kind comments. I don’t thin the silicone with an additive. It’s important in the first layer to capture all the detail, so by blowing the silicone into all the crevices, it makes for a thin layer.
hi Tamara
it’s so impressive and beautiful to see your great step wise your tutorial thanks much much Mem.
i like its very much your way of teaching or briefing
Vamiir